How to Connect LED Strip Lights to Mains: A Step-by-Step Guide
LED strip lights have become incredibly popular for their versatility and energy efficiency. If you're wondering how to connect these fantastic lights to mains power, you've come to the right place. In this article, we'll provide you with a step-by-step guide on connecting LED strip lights to mains 230V AC power for a seamless installation.
Understanding LED Strip Light Components
Before we dive into the connection process, let's familiarise ourselves with the key components of LED strip lights:
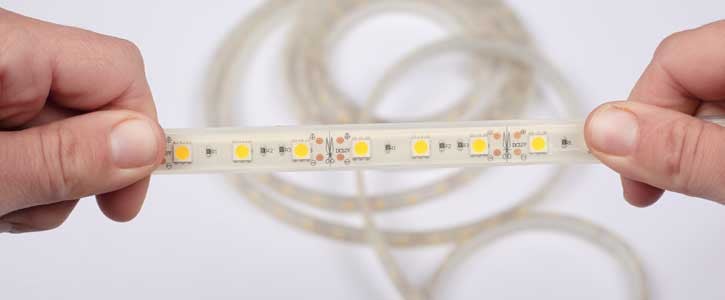
- LED Strip Lights: These flexible strips consist of small light-emitting diodes (LED's) mounted on a thin, adhesive-backed printed circuit board or PCB for short. It works similar to sellotape as it can be stuck down to most surfaces and is also known as LED strip tape (shown below without any input cables).

- Power Supply: Also known as a transformer or LED driver, the power supply converts the mains AC (Alternating Current) voltage into the appropriate low-voltage DC (Direct Current) power required by the LED strip lights.

- Connecting Cables: These wires are used to make the electrical connections between the LED strip lights, power supply, and any additional components such as controllers. Cables for a single colour LED strip have 2 cores (shown below), while colour changing strips have 4, 5 or 6 cores. But colour changing strips are wired into a controller which is wired into the power supply.

Step-by-Step Guide to Connect LED Strip Lights to Mains
Follow these steps to connect your LED strip lights to mains power:
Step 1: Determine Power Requirements
Start by checking the power requirements of your LED strip lights. Typically, the specifications will indicate the required voltage (e.g., 12V or 24V) and wattage per meter. Ensure your power supply matches these requirements to avoid damaging the lights. If your lights are 24V you need a 24V constant voltage LED driver. If you've got 5 metres of LED strip light that's consumes 15 watts per metre, you'll need an LED driver that's capable of powering more than 75 watt.
The selection table below shows recommendations for dimmable and non dimmable LED drivers for our 15 watts per metre COB (Chip on Board) LED strip tape:
| LENGTH | WATTAGE | NON DIM DRIVER | DIMMABLE DRIVER |
|---|---|---|---|
| 1M | 15W | ECP15-24VF-1 | ELED-15-24T |
| 2M | 30W | LPV-60-24 | ELED-30P-24T |
| 3M | 45W | LPV-60-24 | ELED-60P-24T |
| 5M | 75W | LPV-100-24 | ELED-90P-24T |
| 10M | 150W | HLG-150H-24A | ELED-150P-24T |
Step 2: Prepare the Power Supply
Disconnect the power supply from the mains before making any connections. Identify the input and output terminals on the power supply. The input terminals connect to the mains power, with blue for neutral, brown for live and green & yellow for earth. While the output terminals connect to the LED strip lights, with black for negative and red for positive.
Step 3: Make the Electrical Connections
- AC Power Connection: Connect the power supply's input terminals to the mains power using appropriate electrical connections, such as a plug top, light switch or fused spur connection. As you're dealing with electricity you should consult a professional electrician for assistance.
- DC Power Connection: Connect the power supply's output terminals to the LED strip lights. Strip the insulation from the ends of the cables. Match the positive (+) and negative (-) terminals of the power supply to the corresponding terminals on the LED strip lights. Use strip connectors or 162 series connectors which are specifically designed for low-voltage connections to secure the wires. The tricky part with LED tape is when you cut it and want to reconnect it. Usually only one side of the strip will have an input cable, so you'll either need to solder a new input tail on the end or use a solder-free wiring connector, we have 3 versions available for COB tape:
Solder-free input connector with 200mm of cable (adds a new input connection)
Solder-free strip to strip connector (connects 2 strips directly together)
Solder-free interconnection cable with 200mm of cable (ideal for corners & bends)
We also offer a bespoke soldering service or you can purchase custom made LED strip lights here.
Step 4: Test the Connection
Once the electrical connections are mad turn the mains power back on. The LED strip lights should light up if the connection is successful. If not, double-check the polarity and ensure all connections are secure.
Step 5: Mount the LED Strip Lights
After confirming the connection is working correctly, mount the LED strip lights in your desired location. Ensure the surface is clean and dry before adhering the strip lights. Most LED strips come with a self-adhesive backing, while others may require additional mounting clips or brackets. You can also considering mounting them inside an aluminium profile rail which makes the installation look more professional, protects the LEDs and improves heat dissipation. This example below was from a home office installation, as the light was visible, the profile diffused the light and helped to produce a more dot-free lighting effect.

Other Types of Strip Lights to Consider
LED tape isn't the only form of linear strip lighting, another popular style is the mains voltage under cabinet strip light. These LED light fittings are designed as a more energy efficient alternative to fluorescent which used to be the go-to fixture for kitchen under cabinet lighting. They operate directly on mains voltage so you don't need to install an additional power supply. They are limited to only being available in just a few specific sizes, unlike LED tape which can be cut down to size, with cutting intervals every 50mm or so.
The Final Results
Connecting LED strip lights to mains power is a straightforward process when you understand the components and follow a step-by-step guide. Remember to check the power requirements, prepare the power supply, make the electrical connections correctly, and test the connection before mounting the lights.
With this guide in hand, you can confidently install your lights and enjoy their energy-efficient, versatile lighting ambiance in your home or any other space you desire.